
Post by RandomlyKnighted on Aug 11, 2011 10:32:43 GMT -5
A Few Words By The Author
Hey everyone, welcome to my first tutorial on making a Menu bar for your Windows application. In this tutorial, I will teach you how to make a File menu.
Note: It is assumed that you already know how to create a C# project in the IDE. For this program, we will be using Visual Studio 2010 and .NET Framework 4.
The Tutorial
So let's begin by opening up Visual Studio 2010 and create a new project. Let's create a Windows Form Application and I named mine DICdialogTutorial because I was just making it for this tutorial but you came name it anything you want.
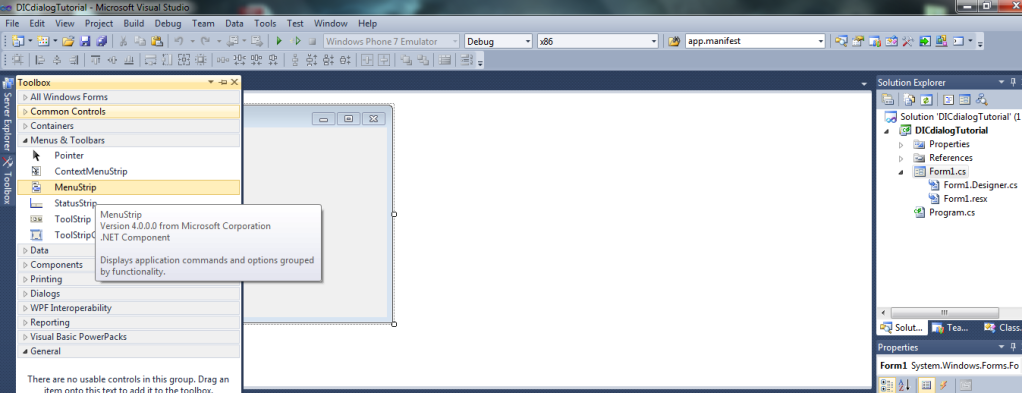
Now that we have our project open and can see the Windows Form let's look to the left and open the Toolbox. If you look in the Toolbox you should see a section labeled Menus & Toolbars let's click that so that the items will drop down. We are looking for the MenuStrip as shown in the picture below.
Drag the MenuStrip over to your Form and position it at the top as shown in this picture.
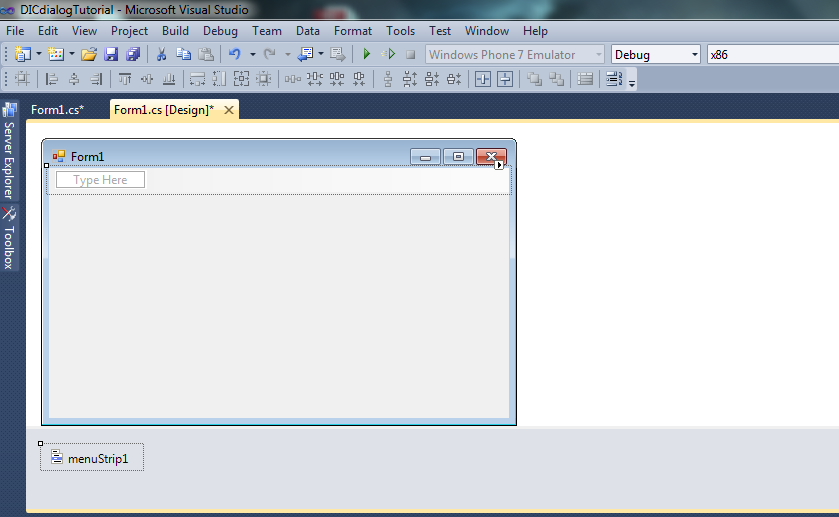
Once we have placed the MenuStrip in the Form we can then begin typing the words New, Open, Save, and Exit into the blanks provided. Just type New into the blank then hit enter and another blank should appear so you can type in Open. Continue until you have typed each one into the blanks provided as shown in the picture below.

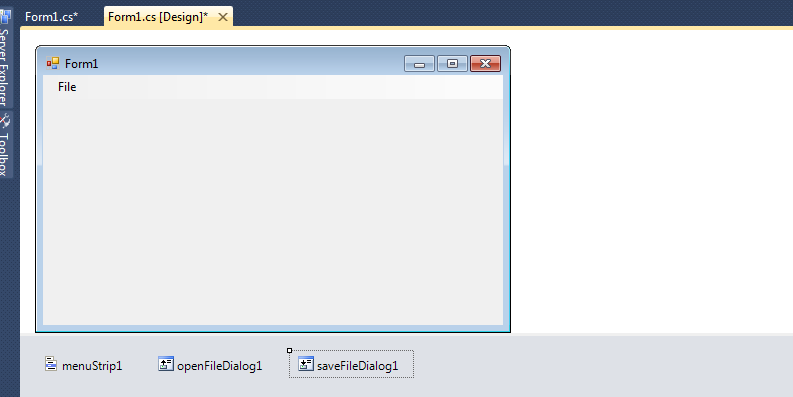
As show in the next picture below, it's time to go back to the Toolbox. Click the triangle beside the word Dialogs so that you can see the items in the Dialog dropdown. We're looking for OpenFileDialog and the SaveFileDialog.

Drag them both to the gray area that is below your form. If you're unsure where I'm talking about just refer to the image below.
Now it's time to set up our shortcuts. Yes, shortcuts. In case you're going huh? what are you talking about. Here's what I mean. Go to the File menu of your Visual Studio you see how it beside the Save it tells you to hit Ctrl + S so you can save using the keyboard shortcuts. Well that's what we're about to do.
As you can see in the picture below when you go to the File menu and then click on New your properties window in the lower right hand corner changes. You are now looking at the properties for that New command. Scroll down until you see the words ShortcutKeys click the drop down beside that and click the checkmark beside Ctrl and then in the drop down for the keys click on N then hit enter. Go back up to your File menu and you should see the shortcut added to your New command. Do this for each command in your file menu and your shortcuts are done. Here is what most people use for the shortcuts:
New Ctrl + N
Open Ctrl + O
Save Ctrl + S
Exit Alt + F4

Now you should have shortcuts for each command. So let’s add a textbox to the form that way we can have something to save and somewhere to put the text when we open the file. Now let's get down to the coding. Double click each command in the File menu so that your event handler appears in the code view. Let's start with the New command:
        private void newToolStripMenuItem_Click(object sender, EventArgs e)
        {
            textBox1.Text = string.Empty;
        }
In the code above, we take the text in the textbox and clear it by emptying the string. That way when we hit the new button it starts us over with an empty textbox.
Now for the Open command.
private void openToolStripMenuItem_Click(object sender, EventArgs e)
        {
            openFileDialog1.Filter = "Text Document (*.txt)|*.txt|All files (*.*)|*.*";
            openFileDialog1.Title = "Open";

            openFileDialog1.InitialDirectory = @"C:\";
            openFileDialog1.RestoreDirectory = false;

            if (openFileDialog1.ShowDialog() == DialogResult.OK)
            {
                string file = openFileDialog1.FileName;
                string text = File.ReadAllText(file);
                textBox1.Text = text;
            }

        }
In this function, we use the OpenFileDialog to specify the type of document we want to open. We then set the title bar of the dialog to say Open. Then we told the dialog that we want it to open up to the C:\ folder every time we open this dialog. The if statement tells the dialog that if the user selects a file then it should read all the text in the file and then display it into the textbox.
Now let’s take a look at the Save dialog.
        private void saveToolStripMenuItem_Click(object sender, EventArgs e)
        {
            string buffer = textBox1.Text;

            // Available file extensions
            saveFileDialog1.Filter = "Text Document (*.txt)|*.txt|All files (*.*)|*.*";
            saveFileDialog1.Title = "Save As";

            // Startup directory
            saveFileDialog1.InitialDirectory = @"C:\";

            // Restores the selected directory, next time
            saveFileDialog1.RestoreDirectory = false;

            // Display the Save file dialog.
            if (saveFileDialog1.ShowDialog() == DialogResult.OK)
            {
                // Get file name from the user.
                string name = saveFileDialog1.FileName;
                File.WriteAllText(name, buffer);
            }
        }
The Save dialog begins by creating a buffer and setting it equal to the text that is in the textbox. We then told the dialog that we want to save the file as a text document. Then we set the dialog title to say Save As. We set the Initial Directory to be the C:\ folder so that it opens there every time and told the dialog that we did not want it restore the directory. Then using the if statement we told the dialog that if the user presses the ok button then it is to take the name the user entered it and use that as the file name and then it writes what is in the textbox (the buffer) to the file.
Finally we will look at the Exit command.
private void exitToolStripMenuItem_Click(object sender, EventArgs e)
        {
            Application.Exit();
        }
This one is really simple. Since we do not have to use any dialogs to close the program we just tell it to exit the application when the user selects Exit.
Now you can run the application and you’re good to go. I hope this application helped you understand the dialog boxes a little bit better. Feel free to ask any questions or post comments on how I could improve my tutorials.